Tool Breakdown
Here you will find information on each of the tools that you will use on Gimp.
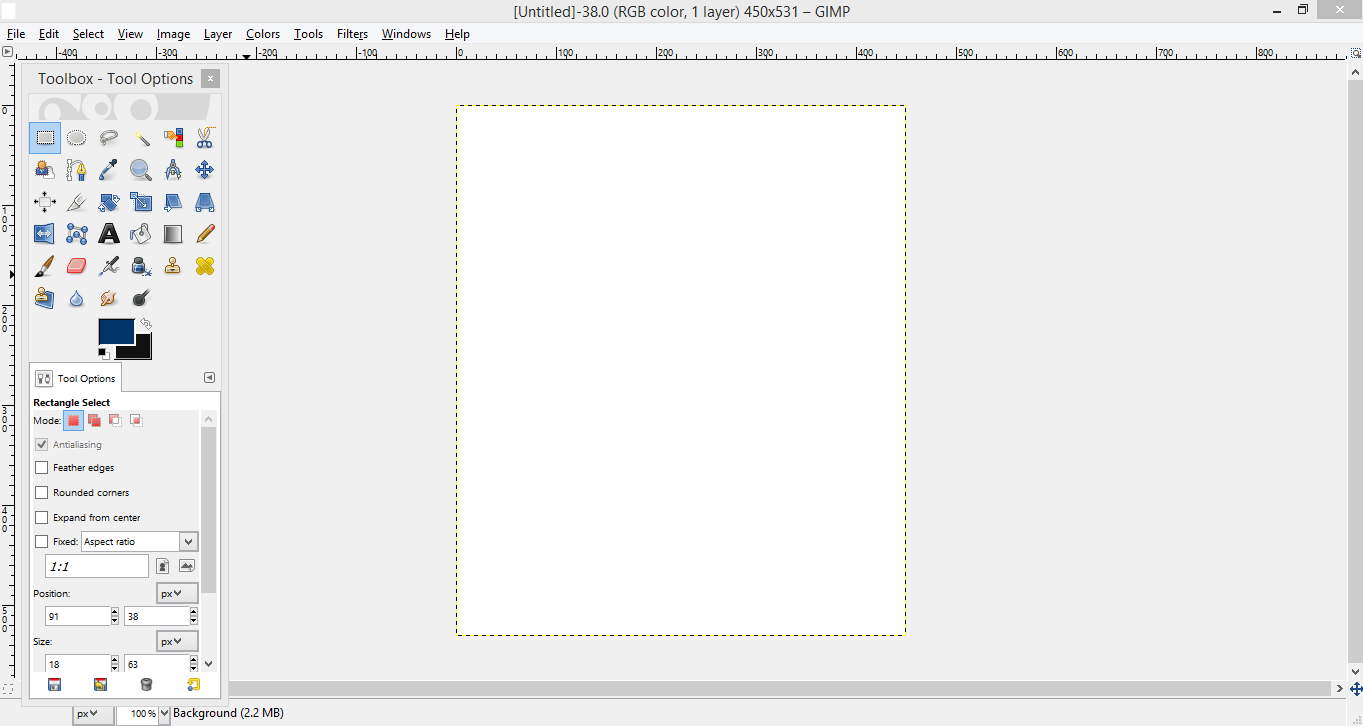
GIMP has a diverse assortment of tools that let you perform a large variety of tasks. The tools can be thought of as falling into five categories:
Selection tools, which specify or modify the portion of the image that will be affected by subsequent actions;
Paint tools, which alter the colours in some part of the image;
Transform tools, which alter the geometry of the image;
Colour tools, which alter the distribution of colours across the entire image;
Other tools, which don't fall into the other four categories.
Selection Tools
Selection tools are designed to select regions from the active layer so you can work on them without affecting the unselected areas. Each tool has its own individual properties, but the selection tools also share a number of options and features in common. There are seven selection tools:

Rectangle Selection
The Rectangle Selection tool is designed to select rectangular regions of the active layer: it is the most basic of the selection tools, but very commonly used.
To use it simply select it and click and drag over the section of image you want to select.

Ellipse Selection
The Ellipse Selection tool is designed to select circular and elliptical regions from an image.
To use it simply select it and click and drag over the section of image you want to select.

Free Select (The Lasso)
The Free Selection tool, or Lasso, lets you create a selection by drawing it free-hand with the pointer, while holding down the left mouse button (or, for a stylus, pressing it against the tablet). When you release the mouse button, the selection is closed by connecting the current pointer location to the start location with a straight line. You can go outside the edge of the image display and come back in if you want to.

The Magic Wand
The Fuzzy Select or Magic Wand tool is designed to select areas of the current layer or image based on colour similarity. The Wand is a good tool for selecting objects with sharp edges. You can change the precision of this tool by increasing or decreasing the Threshold. A higher threshold will select a wider range of colours.

Select by Colour
The Select by Colour tool is designed to select areas of an image based on colour similarity. It works a lot like the Fuzzy Select tool (“Magic Wand”). The main difference between them is that the Magic Wand selects contiguous regions, with all parts connected to the starting point by paths containing no large gaps; while the Select by Colour tool selects all pixels that are sufficiently similar in colour to the pixel you click on, regardless of where they are located.

Intelligent Scissors
This tool has some features in common with the Lasso, some features in common with the Path tool, and some features all its own. It is useful when you are trying to select a region defined by strong colour-changes at the edges. To use the Scissors, you click to create a set of "control nodes", also referred to as anchors or control points, at the edges of the region you are trying to select. The tool produces a continuous curve passing through these control nodes, following any high-contrast edges it can find. If you are lucky, the path that the tool finds will correspond to the contour you are trying to select.
Unfortunately, there seem to be some problems with the edge-following logic for this tool, with the result that the selections it creates tend to be pretty crude in a lot of cases. It is not an easy tool to use and there are other tools that do the job much more effectively.

Foreground Select
This tool lets you extract the foreground from the active layer or from a selection. This tool is perfect for selecting one part of an image and works in a couple of steps.
Roughly select the foreground you want to extract, select as little of the background as possible. Once the selection is made use the paintbrush tool, with a colour totally different to the image and draw a line over it, making sure to go through any vastly different colours. Press enter and your selection is made.
Paint Tools
There are two kinds of Paint tools. Basic brush tools which work with the notion of a pen and paper, and other tools which apply colour differently.

The Pencil
The Pencil tool is used to draw free hand lines with a hard edge. The pencil and paintbrush are similar tools. The main difference between the two tools is that although both use the same type of brush, the pencil tool will not produce fuzzy edges, even with a very fuzzy brush.
Perhaps the most important usage is when working with very small images, such as icons, where you operate at a high zoom level and need to get every pixel exactly right. With the pencil tool, you can be confident that every pixel within the brush outline will be changed in exactly the way you expect.

The Paintbrush
The paintbrush tool paints fuzzy brush strokes. All strokes are rendered using the current brush.

The Airbrush
The Airbrush tool emulates a traditional airbrush. This tool is suitable for painting soft areas of color.

Bucket Fill
This tool fills a selection with the current foreground colour. If you Ctrl+click and use the Bucket tool, it will use the background colour instead.

The Ink
The Ink tool uses a simulation of an ink pen with a controllable nib to paint solid brush strokes with an antialiased edge. The size, shape and angle of the nib can be set to determine how the strokes will be rendered.These are the brush type tools. You can download custom brushes to use with these.

Gradient
This tool fills the selected area with a gradient blend of the foreground and background colours by default, but there are many options. To make a blend, drag the cursor in the direction you want the gradient to go, and release the mouse button when you feel you have the right position and size of your blend. The softness of the blend depends on how far you drag the cursor. The shorter the drag distance, the sharper it will be.[div style="text-align:center;"][sub][b][font color="#000000"]Tool Breakdown[/font][/b][/sub][/div][div style="text-align:center;"][sub]
[/sub][/div][div style="text-align:center;"][sub]Here you will find information on each of the tools that you will use on Gimp. [/sub][/div]
[div align="center"][img alt=" " src="https://embed.gyazo.com/4adabde540eee486b56ff5b92684b84d.png" style="max-width:100%;"][img alt=" " style="max-width:100%;" src="http://i.imgur.com/R2O8PLK.png"]
[/div]
[div style="text-align:center;"][sub]
[/sub][/div][div style="text-align:center;"][sub]GIMP has a diverse assortment of tools that let you perform a large variety of tasks. The tools can be thought of as falling into five categories:[/sub][/div][div style="text-align:center;"][sub]
[/sub][/div][div style="text-align:center;"][sub]Selection tools, which specify or modify the portion of the image that will be affected by subsequent actions;[/sub][/div][div style="text-align:center;"][sub]Paint tools, which alter the colours in some part of the image;[/sub][/div][div style="text-align:center;"][sub]Transform tools, which alter the geometry of the image;[/sub][/div][div style="text-align:center;"][sub]Colour tools, which alter the distribution of colours across the entire image;[/sub][/div][div style="text-align:center;"][sub]Other tools, which don't fall into the other four categories.[/sub][/div]
Selection Tools;;
[div style="text-align:center;"][b][font color="#000000"][sub]Selection Tools[/sub][/font][/b][/div]
[div style="text-align:center;"][sub]Selection tools are designed to select regions from the active layer so you can work on them without affecting the unselected areas. Each tool has its own individual properties, but the selection tools also share a number of options and features in common. There are seven selection tools:

[/sub][/div][div style="text-align:center;"][sub][img style="max-width:100%;" src="http://docs.gimp.org/en/images/toolbox/stock-tool-rect-select-22.png" alt=" "]
[b]Rectangle Selection[/b][/sub][/div][div style="text-align:center;"][sub]
[/sub][/div][div style="text-align:center;"][sub]The Rectangle Selection tool is designed to select  rectangular regions of the active layer: it is the most basic of the selection tools, but very commonly used.[/sub][/div][div style="text-align:center;"][sub]To use it simply select it and click and drag over the section of image you want to select.[/sub][/div][div style="text-align:center;"][sub]
[/sub][/div][div style="text-align:center;"][sub][img src="http://docs.gimp.org/en/images/toolbox/stock-tool-ellipse-select-22.png" style="max-width:100%;" alt=" "]
[b]Ellipse Selection[/b][/sub][/div][div style="text-align:center;"][sub]
[/sub][/div][div style="text-align:center;"][sub]The Ellipse Selection tool is designed to select circular and elliptical regions from an image. [/sub][/div][div style="text-align:center;"][sub]To use it simply select it and click and drag over the section of image you want to select. [/sub][/div][div style="text-align:center;"][sub]
[/sub][/div][div style="text-align:center;"][sub][img style="max-width:100%;" src="http://docs.gimp.org/en/images/toolbox/stock-tool-free-select-22.png" alt=" "]
[b]Free Select (The Lasso)[/b][/sub][/div][div style="text-align:center;"][sub]
[/sub][/div][div style="text-align:center;"][sub]The Free Selection tool, or Lasso, lets you create a selection by drawing it free-hand with the pointer, while holding down the left mouse button (or, for a stylus, pressing it against the tablet). When you release the mouse button, the selection is closed by connecting the current pointer location to the start location with a straight line. You can go outside the edge of the image display and come back in if you want to.[/sub][/div][div style="text-align:center;"][sub]
[/sub][/div][div style="text-align:center;"][sub][img alt=" " style="max-width:100%;" src="http://docs.gimp.org/en/images/toolbox/stock-tool-fuzzy-select-22.png"]
[b]The Magic Wand[/b][/sub][/div][div style="text-align:center;"][sub]
[/sub][/div][div style="text-align:center;"][sub]The Fuzzy Select or Magic Wand tool is designed to select areas of the current layer or image based on colour similarity. The Wand is a good tool for selecting objects with sharp edges. You can change the precision of this tool  by increasing or decreasing the Threshold. A higher threshold will select a wider range of colours.[/sub][/div][div style="text-align:center;"][sub]
[/sub][/div][div style="text-align:center;"][sub][img alt=" " style="max-width:100%;" src="http://docs.gimp.org/en/images/toolbox/stock-tool-by-color-select-22.png"]
[b]Select by Colour[/b][/sub][/div][div style="text-align:center;"][sub]
[/sub][/div][div style="text-align:center;"][sub]The Select by Colour tool is designed to select areas of an image based on colour similarity. It works a lot like the  Fuzzy Select tool (“Magic Wand”). The main difference between them is that the Magic Wand selects contiguous regions, with all parts connected to the starting point by paths containing no large gaps; while the Select by Colour tool selects all pixels that are sufficiently similar in colour to the pixel you click on, regardless of where they are located.[/sub][/div][div style="text-align:center;"][sub]
[/sub][/div][div style="text-align:center;"][sub][img alt=" " src="http://docs.gimp.org/en/images/toolbox/stock-tool-iscissors-22.png" style="max-width:100%;"]
[b]Intelligent Scissors[/b][/sub][/div][div style="text-align:center;"][sub]
[/sub][/div][div style="text-align:center;"][sub]This tool has some features in common with the Lasso, some features in common with the Path tool, and some features all its own. It is useful when you are trying to select a region defined by strong colour-changes at the edges. To use the Scissors, you click to create a set of "control nodes", also referred to as anchors or control points, at the edges of the region you are trying to select. The tool produces a continuous curve passing through these control nodes, following any high-contrast edges it can find. If you are lucky, the path that the tool finds will correspond to the contour you are trying to select.[/sub][/div][div style="text-align:center;"][sub]Unfortunately, there seem to be some problems with the edge-following logic for this tool, with the result that the selections it creates tend to be pretty crude in a lot of cases. It is not an easy tool to use and there are other tools that do the job much more effectively.[/sub][/div][div style="text-align:center;"][sub]
[/sub][/div][div style="text-align:center;"][sub][sub][img alt=" " src="http://docs.gimp.org/en/images/toolbox/stock-tool-foreground-select-22.png" style="max-width:100%;"][/sub]
[b]Foreground Select[/b][/sub][/div][div style="text-align:center;"][sub]
[/sub][/div][div style="text-align:center;"][sub]This tool lets you extract the foreground from the active layer or from a selection. This tool is perfect for selecting one part of an image and works in a couple of steps.[/sub][/div][div style="text-align:center;"][sub]Roughly select the foreground you want to extract, select as little of the background as possible. Once the selection is made use the paintbrush tool, with a colour totally different to the image and draw a line over it, making sure to go through any vastly different colours. Press enter and your selection is made.[/sub][/div][sub]
[/sub]
Paint Tools;;[div style="text-align:center;"][sub][b][font color="#000000"]Tool Breakdown[/font][/b][/sub][/div][div style="text-align:center;"][sub]
[/sub][/div][div style="text-align:center;"][sub]Here you will find information on each of the tools that you will use on Gimp. [/sub][/div]
[div align="center"][img alt=" " src="https://embed.gyazo.com/4adabde540eee486b56ff5b92684b84d.png" style="max-width:100%;"][img alt=" " style="max-width:100%;" src="http://i.imgur.com/R2O8PLK.png"]
[/div]
[div style="text-align:center;"][sub]
[/sub][/div][div style="text-align:center;"][sub]GIMP has a diverse assortment of tools that let you perform a large variety of tasks. The tools can be thought of as falling into five categories:[/sub][/div][div style="text-align:center;"][sub]
[/sub][/div][div style="text-align:center;"][sub]Selection tools, which specify or modify the portion of the image that will be affected by subsequent actions;[/sub][/div][div style="text-align:center;"][sub]Paint tools, which alter the colours in some part of the image;[/sub][/div][div style="text-align:center;"][sub]Transform tools, which alter the geometry of the image;[/sub][/div][div style="text-align:center;"][sub]Colour tools, which alter the distribution of colours across the entire image;[/sub][/div][div style="text-align:center;"][sub]Other tools, which don't fall into the other four categories.[/sub][/div]


 Icon from the tool box.